Do you currently have a blog on Blogger which you’d like to transfer to self-hosted WordPress? Although there are a couple of upfront costs and may be a slight learning curve, I highly recommend WordPress.org – it gives you more control, more options and opens up a world of possibilities for growth.
What is WordPress.org?
WordPress is a content management system (CMS) that allows you to manage all aspects of your site all from an easy-to-use dashboard. WordPress.org is the self-hosted version of WordPress. It’s important to note that WordPress.org is different to WordPress.com (similar to Blogger/Blogspot.com), which is a hosted solution that has its own limitations.
WordPress is popular because it gives you full control over your website, flexibility to create anything you can think of, access to plugins that can extend the functionality of your site, and much more.
Step-by-step guide to moving from Blogger/Blogspot to self-hosted WordPress (WordPress.org)
In this guide, I’ll walk you through the steps of exporting your content from Blogger and importing it into your new WordPress site, setting up the correct permalinks, redirecting visitors from Blogger to WordPress and a list of things you should do after moving.
1. Purchase your web hosting (and domain if necessary)
In order to have a self-hosted WordPress site, you’ll need to to purchase your own hosting package from a hosting provider, and a domain name.
The linked articles above will help you with choosing your hosting provider and type, and your domain registrar.
If you have a free domain on Blogger (like .blogspot.com), you’ll need to find and register a new custom domain name.
If you are already using a custom domain on Blogger (like mydomain.com), then you’ll need to transfer it to your WordPress site by pointing the DNS to your new web host.
2. Install self-hosted WordPress
So now that you have your domain and hosting purchased, it’s time to install WordPress. There’s two main way you can do this – either “automatically” using a one-click install method, or manually by following WordPress’ famous 5-minute installation guide.

Launch your WordPress site in just 5 days!
My mini-guide will be delivered to your inbox for five days and take you step by step through setting up and launching your self-hosted WordPress site.
3. Export your content from Blogger
Login to your Blogger dashboard and go to Settings > Other. Under the ‘Import & back up’ section, click on the ‘Back up Content’ button. This will bring up a popup where you need to click ‘Save to your computer’.

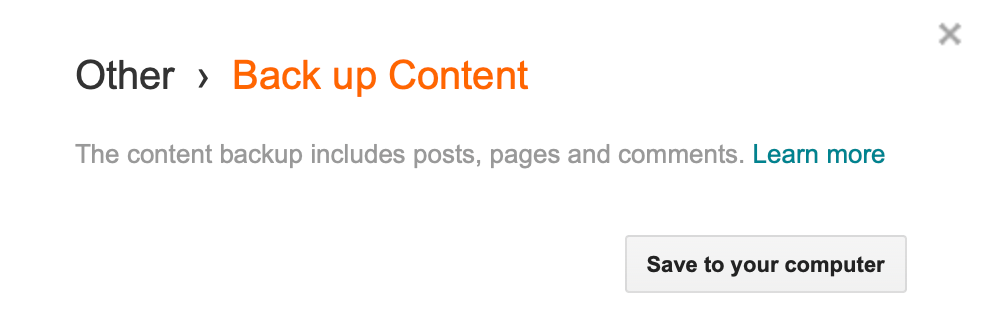
Your Blogger content will now be downloaded to your computer in an XML file. Remember the location of this file, as we’ll need it in the next step.
4. Import your Blogger content to WordPress
Login to your WordPress admin area by visiting yourdomain.com/wp-admin. Set the timezone on your WordPress site by going to Setting > General.
Now go to Tools > Import. You’ll see an option to install the Blogger import plugin.
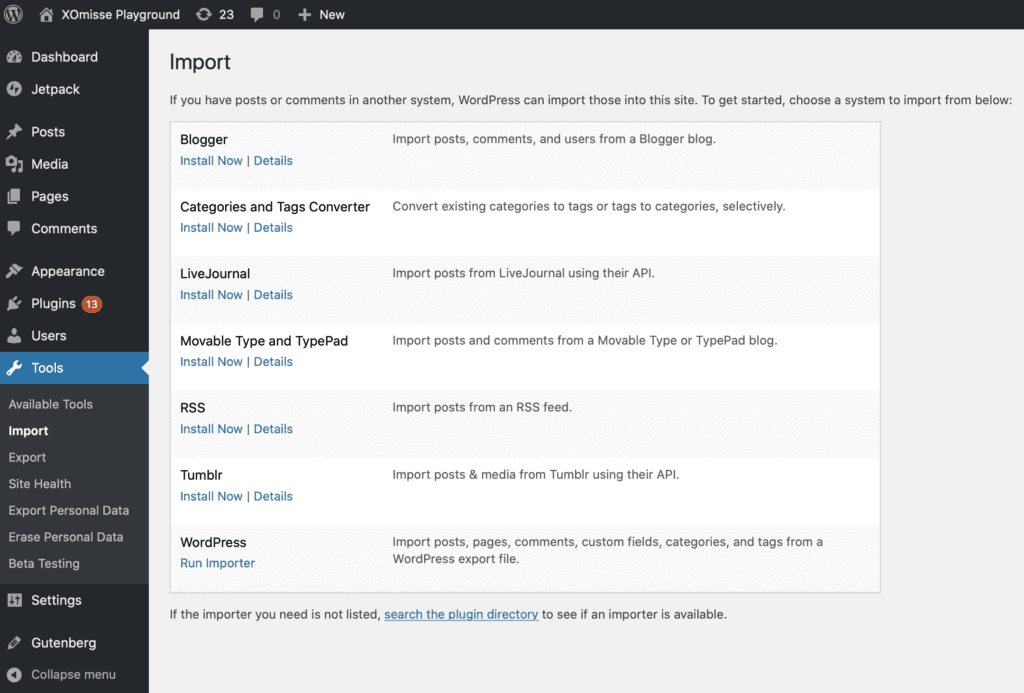
Once installed, click Run Importer. WordPress will ask you to upload the XML file that you downloaded in the previous step. Click on Choose File and select the downloaded .xml file from Blogger. After selecting it, click upload and import.
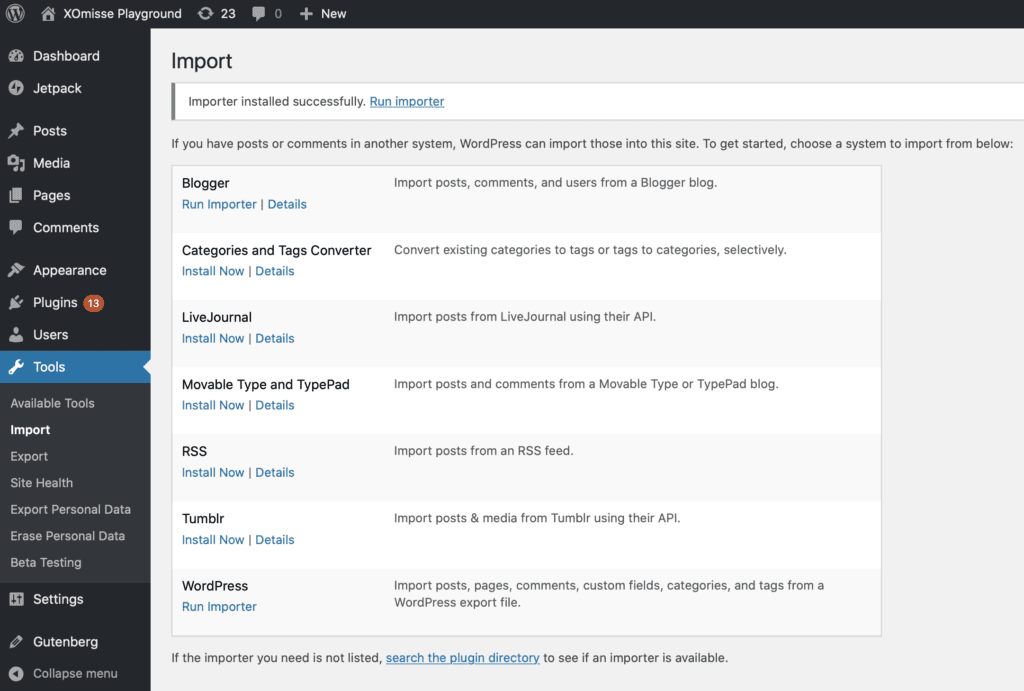

WordPress will ask you to sign an author to the posts, you can import a previous user, create a new user or select an existing user. You may see an option to Download and import file attachments also, if so make sure to check that option. Click submit.

If your file is too large, you may need to split it or ask your web host to temporarily increase the limit to allow you to migrate.
WordPress will now begin to upload your content, this may take some time depending on how big your site was and how much media you had. Have a look through everything and make sure that it has all been imported correctly. Sometimes, if a site has a lot of content or big images, some images won’t be imported correctly. If this happens, you can use a plugin like Archivarix External Images Importer, Import External Images or Auto Upload Images.
5. Setting up permalinks
Permalinks is the term used for URL structure of individual posts and pages.

To set permalinks, go to Settings > Permalinks from your WordPress dashboard.
If you don’t already have a custom domain name on Blogger, you can set it to whatever you want because we will be redirecting all your posts to the right place later anyway. I personally recommend “Post name”.
If you are migrating from Blogger with a custom domain, you will need your URL structure to be the same as your Blogger URL structure. Choose the custom structure option and add the following text in the box next to the custom structure field.
/%year%/%monthnum%/%postname%.html
This will match your URL structure from Blogger so that posts can be redirected correctly without experiencing any 404 not found error pages.
Although this should help in most cases, sometimes the URL (or slug) will not match those used by Blogger. This is because Blogger cuts off the link names after a certain point, but WordPress does not. If this is the case you may need to setup some custom redirects using the Redirection plugin.
6. Redirect from Blogger to WordPress
This is one of the most important steps, as setting up a redirection from your Blogger blog to WordPress will mean you don’t lose traffic or your Google rankings. If you had the same custom domain name on Blogger that you moved to WordPress, you can skip this step!
Install and activate the Blogger to WordPress Redirection plugin by rtCamp. Note that this hasn’t been updated in over a year. Once installed, go to Tools > Blogger to WordPress Redirection page and click on the ‘Start Configuration’ button.
Install and activate the Blogger 301 Redirect. Once installed, go to Settings > Blogger 301 Redirect. Check the recommended options as well as the option to Remove parameters from URL.

Log back in to your Blogger account, go to Theme, click the three dots and then Backup. Download your theme backup.

Now click the three dots again and choose Edit HTML.
Follow the instructions shown on the Blogger 301 Redirect settings page. Here is an overview – highlight all of the code within the editor (using CMD A on Mac or CTRL A on Windows) and delete. Replace it with one of the codes available on the Blogger 301 Redirect settings page. Click Save.
Your Blogger blog posts should now redirect to your WordPress posts. Test a couple of posts to make sure by going to Posts on Blogger and clicking View.
7. Move pages and gadgets
Pages and gadgets don’t automatically get imported from Blogger. You will have to manually move over both of these.
On Blogger, open the page you want to copy. Switch to the HTML editor and copy all of the code within the texture box. Go to your WordPress dashboard in a new tab and create a new page. Click the three dots and switch to code mode. Paste in the copied page content. And repeat these steps for each page.

You also have to manually move over any available gadgets to WordPress. Gadgets are known as widgets on WordPress. On Blogger, go to Layout and find the gadgets you want to copy over to WordPress. Copy all of the text or HTML. Open WordPress in a new tab, go to Appearance > Widgets and drag a new Text or Custom HTML widget into your sidebar and paste in the copied text.
8. Final steps
There are a few extra things I like to do for my Consult + Code clients during this process, so I thought I would add them here.
Move labels to categories and tags
In Blogger you can add labels to organise your posts, this is known as categories and tags on WordPress. When you import your posts from Blogger, all of your labels get turned into categories.
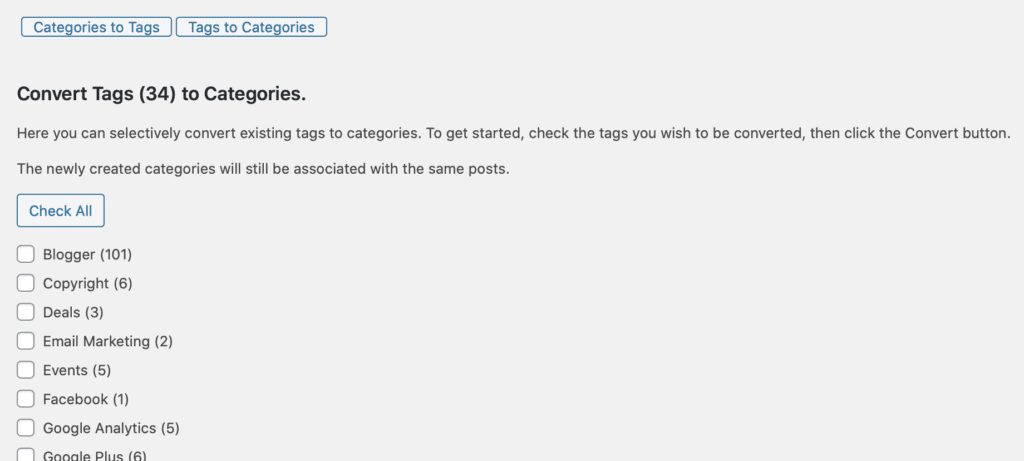
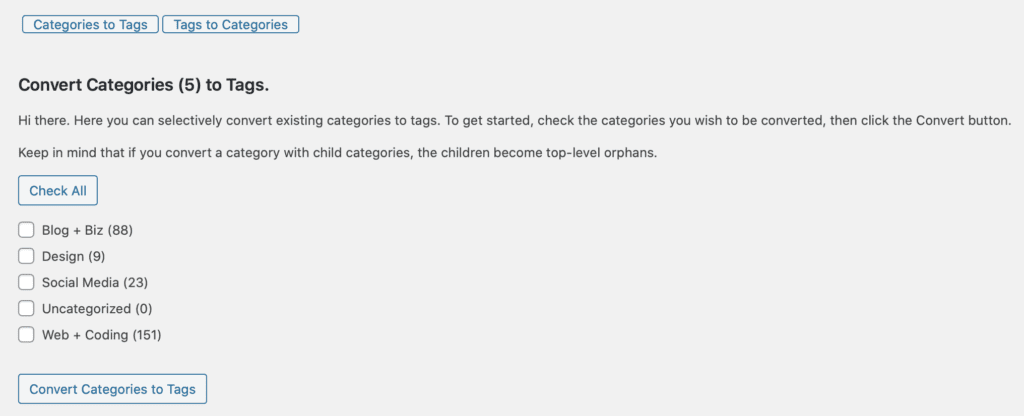
If you want to organise your posts properly, you’ll want to convert some of those categories into tags.
To do this go to Tools > Import on WordPress and install Categories and Tags Converter. Once installed, go to Tools > Import > Categories and Tags Converter. You will be shown a list of categories, which you can select to convert into tags.
Setup a new search console
If you changed to a new custom domain, then you should setup a new Google Search Console property. You can then submit a new sitemap and request re-indexing of your content. You may want to submit a change of URL to Google to inform them of your new domain.
Redirect your Blogger RSS feed
On Blogger, go to Settings > Other. Look for the field titled Post Feed Redirect URL. You need to put your WordPress feed url in there, which will be something like http://www.yoursite.com/feed.

If you’re using FeedBurner instead of the WordPress feed, then put your Feedburner URL instead and update the Original Feed on Feedburner to your WordPress feed URL.
What’s next?
You can now move on to installing a theme and essentials plugins, installing Google Analytics, general setup and adding a navigation menu, setting up caching and a CDN for speed, adding anti-hacking security and configuring HTTPS setup so your site is secure.

Launch your WordPress site in just 5 days!
My mini-guide will be delivered to your inbox for five days and take you step by step through setting up and launching your self-hosted WordPress site.
