There’s been a lot of talk lately about the need for bloggers to understand the technical side of their websites. This post will show you how to set up and login to an FTP client and access your WordPress files.
Related: Hosting 101 – complete guide to web hosting

What is FTP/SFTP?
FTP is short for File Transfer Protocol. It allows you to transfer files from software on your computer (client) to your website hosting account (server). SFTP stands for Secure File Transfer Protocol (or SSH File Transfer Protocol), which is a more secure version of FTP.
Once logged in to an FTP client (like FileZilla or Cyberduck) using specific credentials from your web host, you can see the files and folders that make up your site. It’s important to note that not all hosts will allow you to access your files via FTP or SFTP.
When would I need to use this?
If you want to manually upload, download or edit the files on your site. This includes
- Manually installing WordPress
- Manually uploading a plugin/theme
- Editing or tweaking the theme files
- Manually deactivating plugins/themes
- Fixing common WordPress issues
- Resolving other bugs or issues
How to connect to your WordPress site using FTP
For this tutorial I’ll be using FileZilla as my FTP client, you can download it here. Once downloaded you’ll need to install the app on your computer.
You’ll then need to find your FTP login details. Sometimes they will be included in your welcome email from your host. If not, you should be able to find them in the cPanel of your web host provider. You’ll need your host/server address, username, password and port.
Once you have the login information, you need to open FileZilla and then go to File > Site Manager. This will bring up a window, click on the ‘New Site’ button and add your website name.

In the protocol field, select SFTP if your hosting provider supports it. If not, stick with FTP.
Now fill in the host/server address that you collected earlier. This can sometimes be your domain.
If you are using FTP you will also see an option called Encryption, set this to Require explicit FTP over TLS.
Choose Normal for the logon type field and enter your FTP username and password. Now you can click on the connect button to continue. FileZilla may show you a certificate popup, click OK.
FileZilla will now attempt to login to your site. Once connected, you will see the list of files and folders in Remote Files on the right (and your Local Files on the left).

As a WordPress user, the main folder you’ll be concerned about at this point is the wp-content folder. This holds your plugin, theme and upload folders.
Warning: please ensure you do not accidentally rename, move or delete files as this will impact your site.
How do I upload plugins?
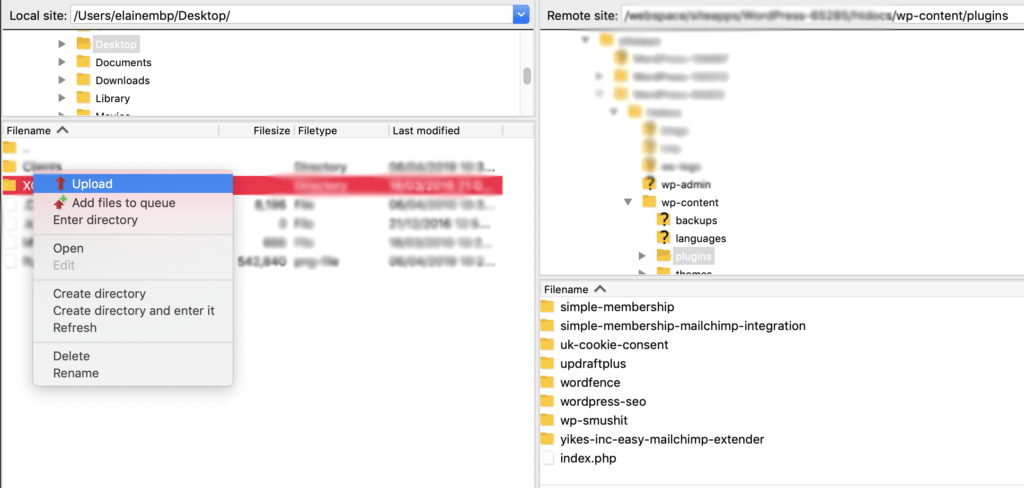
If you want to manually upload a plugin you will first need to download the plugin to your computer and unzip the file. Under Remote site (on the right), enter the wp-content/plugins folder. Under Local site (on the left) find the unzipped folder, right-click and select upload. Once the plugin has been uploaded, visit the plugins page on your WordPress admin to activate it.

How do I edit theme files?
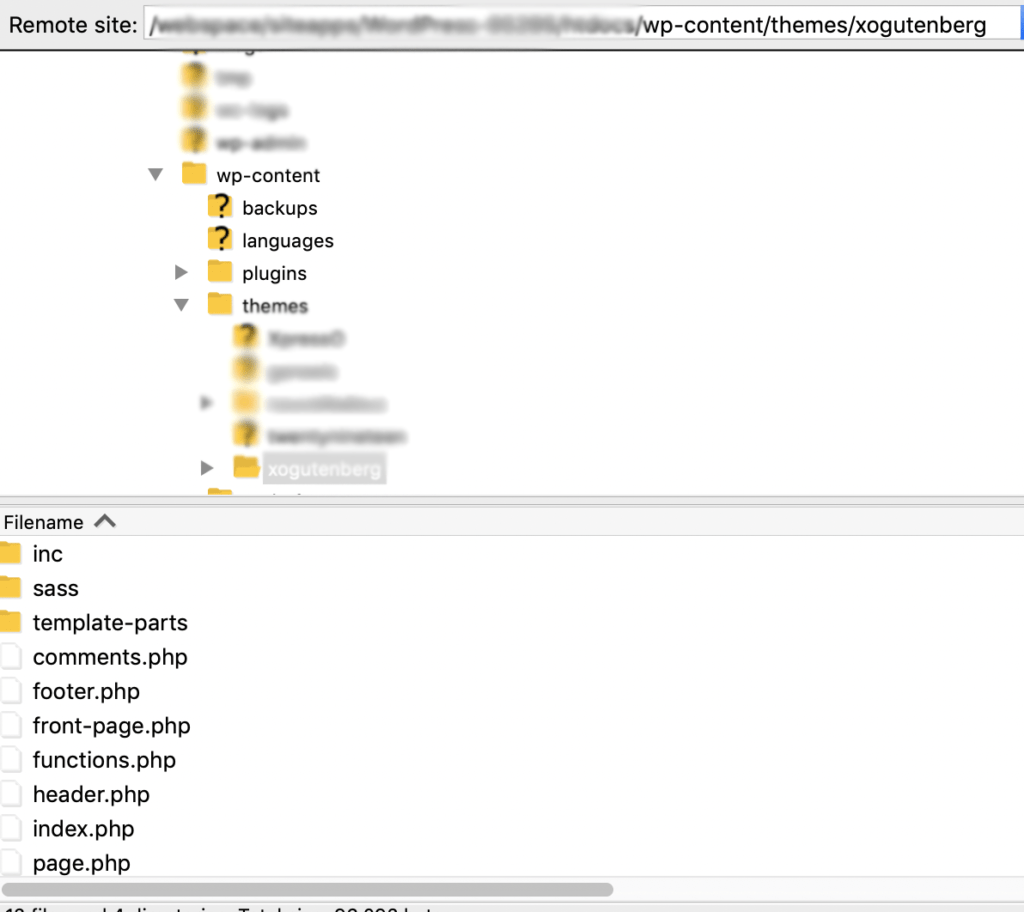
If you need to edit a theme file, visit the wp-content/themes folder and find the file you need to edit.
For example, find style.css to add CSS styling to your blog or site theme.
To edit theme files you’ll need to use a text editor like Sublime Text, Notepad or TextWrangler.

How do I backup files?
You can also use FTP to backup all WordPress files. Simply select all files and folders in the root folder and download them to your computer. This does not include your database so you would need to back that up separately.