Choosing the right platform to build your website is a big decision for a new business owner or creator. It’s the foundation upon which your entire online presence will be built, and you need one that is powerful, flexible and fully under your control.
In this guide, we’re going to break down why WordPress is the best choice, the fundamental differences between the two versions and the powerful benefits that make it the global market leader.
Table of contents
Introduction
What is WordPress?
WordPress is the world’s most popular tool for building websites, but it comes in two distinct forms: the fully-customisable, self-hosted version (WordPress.org) and the simpler, managed version (WordPress.com).
We’ll focus exclusively on the self-hosted option in this guide, so from now on where you see WordPress know that we’re talking about WordPress.org.
At its core, WordPress is a free, Open-Source Content Management System. What does that mean?
- Open-Source: the software’s source code is publicly available for anyone to use, modify and enhance. WordPress isn’t controlled by a single company but is constantly improved by a massive global community of developers.
- Content Management System (CMS): user-friendly operating system for your website that allows you to create, edit, organise and publish content on the web without writing code.
The difference between WordPress.org vs. WordPress.com
One of the first things that trips up new users is the difference between the two WordPress websites.
Simply put, one gives you total freedom (WordPress.org) while the other puts a few important limits in place (WordPress.com). WordPress.org can seem overwhelming as a beginner, but long-term it’s a better option.
| Feature | WordPress.org | WordPress.com |
|---|---|---|
| Control & Ownership | Complete control and full ownership of your site and data. | Limited control; your site must adhere to their Terms of Service. |
| Cost | Free software, but you pay for web hosting and a domain name. | Offers a Free plan, but you must upgrade to paid plans to unlock essential features. |
| Plugins & Themes | Unlimited access to the entire WordPress ecosystem (thousands of plugins and themes). | Restricted access unless you’re on a high-tier paid plan. |
| Monetisation | No restrictions. You can run any ads, use any eCommerce platform, and build a membership site. | Restrictions on lower-tier plans; you cannot run your own ads or set up full eCommerce unless you upgrade. |
| Ideal For | Business owners, professional bloggers, e-commerce sites, and anyone who wants total scalability. | Hobby bloggers, personal sites, or those who want an absolute zero-maintenance experience. |
Recommended reading: The difference between hosted and self-hosted blogging platforms
Why is WordPress the best choice for small businesses?
As of April 2025, 43.4% of the websites on the internet run on WordPress. To put that into perspective, the next closest platforms are Shopify (4.8%), Wix (3.7%), Squarespace (2.3%), Joomla (1.5%), and Drupal (0.8%).
And if you look only at the websites that use a CMS, WordPress’ market share is an astounding 61.3%.
That’s impressive, but not surprising! For new entrepreneurs and small business owners, the following benefits are why it’s the most powerful foundation you can choose:
1. Website ownership
Unlike other “website builders” (like Squarespace or Wix) where your site is essentially rented within their platform, the self-hosted WordPress model gives you complete ownership of your files and database.
You own the content, the data and you can move your website to any hosting provider at any time without restriction.
2. Flexibility and scalability
WordPress is designed to grow with you.
You can start small with a simple one-page portfolio or basic blog. As your business expands, the platform can handle a complex, multi-language corporate site, a global e-commerce store with thousands of products or a premium membership platform.
3. Cost-effective
The core WordPress software is free to download and use. Your only essential startup costs are a domain name (your site’s address) and web hosting (where your files live).
This dramatically reduces the initial development cost compared to building a custom-coded site, making it perfect for bootstrapping entrepreneurs.
In saying that, you may choose to pay for a premium theme or even hire a web designer and developer for a custom site or ongoing maintenance. The key is that the platform lets you decide where to invest your budget.
4. Built-in SEO
WordPress is built to be search engine friendly right out of the box. Its clean, structured code makes it easy for search engines like Google to “crawl” (read) and index your content. And SEO plugins allow you to implement advanced SEO strategies without coding knowledge.
5. Ecosystem of extensions
The true power of WordPress lies in its community-driven extensions.
Themes change the entire design and aesthetic of your site instantly. Plugins add any type of functionality you can imagine, from contact forms and payment gateways to advanced security and gallery features. If you need a feature, there’s almost certainly a plugin for it.
Make Marketing Manageable
(even with limited time, money and know-how)
The latest strategies, insights and updates delivered to your inbox.
No spam or unnecessary emails. You can unsubscribe at any time.
Getting Started
Your site’s home
Building a self-hosted WordPress website requires two core elements: a Domain Name and Web Hosting.
1. Domain name
Your domain name is your website’s address on the internet (e.g., xomisse.com).
If your website is a house, the domain name is the unique street address that directs visitors to it.
Keep it concise, brand-specific and easy to spell. While .com remains the gold standard for credibility, don’t be afraid to use relevant extensions like .co, .net or a niche-specific one (like ) if your .blog or .shop.com is unavailable.
Many business owners purchase several closely related domains (e.g., all the common misspellings or different extensions like .net and .co). You can set these extra domains to automatically redirect to your main .com site. This protects your brand and ensures nobody else can steal your traffic.
Recommended reading: Domains 101: complete guide to purchasing a domain for your blog
2. Web hosting
Web hosting is the physical space on a remote server where all your website’s files, images and data are stored.
If your website is a house, the hosting is the land and the foundation it sits on, as well as the engine that serves up the content whenever someone types in your domain name.
For a new business or blog, Shared Hosting is the most cost-effective and appropriate option. It means your site shares resources with other sites on one powerful server, keeping the price low while providing all the performance you need in the early stages.
Choosing a reputable host is critical for speed, security, and support. Prioritise hosts that offer 24/7 WordPress Support, Free SSL Certificate, servers optimised for WordPress performance and a guaranteed uptime of 99.9% or higher.
Recommended reading: Hosting 101: complete guide to purchasing hosting for your blog
The WordPress install
You’ll be thankful to learn that installing WordPress is easier than ever these days, thanks to one-click installers provided by most web hosts. This makes the process a whole lot easier for beginners!
Once you’ve purchased your domain and hosting package, follow these steps:
- Log into Your Host’s Control Panel: You will receive login details for your hosting account (often a cPanel or a custom dashboard).
- Locate the WordPress Installer: Find the section labeled “WordPress,” “Install WordPress,” or “Softaculous Apps Installer.”
- Configure Basic Settings: The installer will ask you for a few details:
- Domain: Select the domain name you just registered.
- Site Name: Enter your business name or blog name (e.g., XOmisse). You can change this later.
- Admin Details: Create your login credentials. You will need to remember these! Use a strong, unique password and a username that is not “admin.”
- Click “Install”: The installer handles the rest, installing the core WordPress files and creating the necessary database in about 60 seconds.
Congratulations! Your website is now live and the WordPress software is installed.
Recommended reading: How to install and setup self-hosted WordPress in 4 easy steps
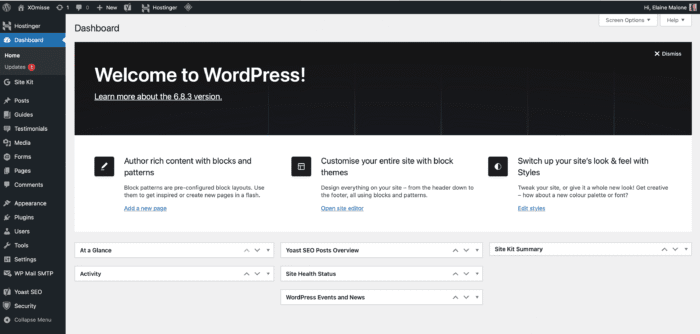
The WordPress Dashboard
Once the installation is complete, you will log into your site’s administration area. This is the WordPress Dashboard (often found at yourdomain.com/wp-admin), where you will manage all aspects of your content, design and functionality.
The Dashboard is made up of a few key areas:
1. The Admin Menu
This is the main navigation hub in the left sidebar. Its contents are grouped logically, separating content creation from site management.
Understanding these key links is essential:
| Menu Item | Controls |
|---|---|
| Dashboard | Your landing page, a quick summary of recent activity and site health. |
| Posts | Used for managing dynamic, time-sensitive content like blog posts, news or articles. |
| Media | Your library for images, videos, PDFs and other files you upload. |
| Pages | Used for static, timeless content like your Homepage, About Page, and Contact Page. |
| Comments | Moderating and responding to user comments on your posts. |
| Appearance | Managing your site’s design (themes, menus, widgets and overall look). |
| Plugins | Installing, updating and managing the extensions that add features to your site. |
| Users | Managing who has access to your site and their administrative role. |
| Settings | This is where you configure your site title, SEO-friendly URLs (Permalinks) and other basic controls. |
2. The Admin Bar
A thin black bar at the very top of the screen that remains visible even when you are viewing the public-facing side of your site. It provides quick access to frequently used actions like:
- Your Site Name: Click this to quickly switch between the front-end (what visitors see) and the back-end (the Dashboard).
- New: A quick-add button for creating a new Post, Page or uploading Media.
- Updates: A notification bubble showing when your Core, Themes or Plugins need updating.
Understanding Core WordPress Concepts
Posts vs. Pages
Posts and Pages are the two main content types in WordPress, but they serve entirely different purposes. Knowing when to use each one is crucial for a well-structured site and for effective SEO.
| Feature | Posts | Pages |
|---|---|---|
| Summary | Dynamic timely content | Static timeless content |
| Purpose | Used for content that is expected to change or become less relevant over time (articles, news tutorials, etc.) | Used for essential, evergreen information that rarely changes (company info, contact forms, etc.) |
| Organisation | They are Displayed in reverse chronological order (latest first) on a blog feed. Organised using Categories and Tags. | Live outside the blog feed and are typically linked in the main navigation menu. Organised hierarchically (Parent/Child pages). |
| Metadata | Includes the Publish Date and Author name by default. | Typically doesn’t include a publish date or author, keeping the focus on its timeless relevance. |
| Interaction | Comments are enabled by default to encourage discussion and community. | Comments are disabled by default, as they are not meant for dialogue. |
| Examples | Blog articles, weekly news roundups, time-sensitive guides, case studies. | Homepage, about Us, services, contact, privacy policy, landing pages. |
Categories vs. Tags
Posts use a system called Taxonomy to help users and search engines navigate your content. While both organise posts, their roles are distinct:
Categories
Categories are meant for the broad, general grouping of your content. They represent the main sections or major topics of your website.
Their role is to create a clear, hierarchical structure. Every post must belong to at least one category.
Keep your list of categories small (aim for 5-10 core categories). You can use subcategories if needed.
Tags
Tags are specific, detailed keywords that describe the unique topics within a single post.
Their role is to micro-categorise content and connect related posts regardless of their category.
Use a small, relevant set of tags per post (3-5 max). Tags are narrow and descriptive, you shouldn’t use the same term for a Category and a Tag.
The Media Library
The Media Library is where WordPress stores every image, video and document you upload.
Slow-loading images are one of the biggest killers of site speed and SEO performance. Here are some recommendations for keeping things optimised:
- Resize before you upload: Never upload a massive, full-resolution photo straight from your camera (that could be 5,000 pixels wide). Resize the image on your computer to a width suitable for your website (typically 1200–1600 pixels wide is enough).
- Compress the file: Use a free online tool or a WordPress plugin to compress the image file size (from 1MB to 150KB) without noticeable quality loss.
- Optimise the file name: Name the file descriptively and use hyphens, not spaces, before you upload it (
beginners-WordPress-guide.jpginstead ofIMG001.jpg). - Add Alt Text: Once uploaded to the Media Library, fill in the Alt Text field. This is a descriptive sentence that explains the image’s content. It is crucial for accessibility (screen readers) and helps search engines index your images.
Writing content using the Block Editor
Since 2018, the standard WordPress editor has been the Block Editor (codenamed Gutenberg). It replaced the old, simple text-box editor with a visual, block-based system.
Everything you add to your page is a Block. A paragraph of text is a block. An image is a block. A button is a block. A heading is a block.
Key Blocks:
- Paragraph Block: Standard text.
- Image Block: For adding media.
- Heading Block: Crucial for structure (H1, H2, H3 etc.) and SEO.
- List Block: For bulleted or numbered lists.
- Columns Block: Allows you to create side-by-side layouts.
You build your content like digital LEGO. You can insert, rearrange and customise the settings of each individual block to create visually complex, professional layouts without touching any code.
Design: Themes
What are WordPress Themes?
A WordPress Theme is the collection of files (templates, stylesheets, images and code) that dictate your website’s overall visual presentation.
Your theme determines the layout of your site, the color schemes, the font styles, the design of your header and footer, and how your blog posts are displayed.
If WordPress Core is the engine and content is the fuel, the Theme is the body, paint job, and interior of the car. It changes the look and feel without changing the underlying content or core functionality.
Choosing the right theme for your small business
Selecting a theme isn’t just about aesthetics; it’s a performance and business decision. A bad theme can break your site’s speed and security.
Prioritise responsive design
A responsive theme is one that automatically adjusts its layout and content to look great on any screen size – desktop, tablet or smartphone.
Over half of all internet traffic comes from mobile devices. If your site looks broken or requires horizontal scrolling on a phone, visitors will leave instantly. Google uses mobile-friendliness as a key ranking factor in its search algorithm. Always preview the theme on different devices before choosing it.
Free vs. Premium Themes
You have three main options for themes:
- Free Themes: Available in the official WordPress Repository, these are vetted by the WordPress team for basic security and clean code. They tend to offer fewer customisation options.
- Premium Themes: Available on marketplaces, these often include advanced layouts, features and dedicated support.
- Custom Themes: Designed and built from scratch by a web designer/developer to meet your exact specifications.
Start with a free, well-coded, lightweight theme. Themes released by WordPress (like the Twenty Twenty-Five theme) are excellent starting points, especially now that the Block Editor lets you build complex layouts yourself. These themes are fast, secure and fully compatible with the modern WordPress ecosystem.
Recommended reading: How to choose and install a WordPress theme
Customising your design
Once you install and activate your theme (via Appearance > Themes), you can modify its appearance using one of two methods:
1. Classic Themes: The WordPress Customizer
This is the traditional way to adjust site settings. When you click Appearance > Customize, you enter a screen with two parts: a menu sidebar on the left and a live preview of your site on the right.
- Site Identity: Change your Site Title and Tagline, and upload your Logo and Site Icon (favicon).
- Colors & Background: Change the primary colors and background images/colors.
- Menus: Manage and assign your main navigation links (Header Menu, Footer Menu).
- Widgets: Add small content blocks (e.g., a search bar, recent posts list) to pre-defined theme areas like the sidebar or footer.
2. Block Themes: The Full Site Editor (FSE)
The modern generation of themes (called “Block Themes”) uses the Site Editor instead of the Customizer. This is part of the ongoing Gutenberg project and extends the concept of blocks to your entire site.
You can use blocks to edit not just the content area, but also your Header, Footer, and Page Templates. This gives you visual drag-and-drop control over every inch of your site, marking the future of WordPress design.
Functionality: Plugins
What are WordPress Plugins?
A Plugin is a piece of software that “plugs in” to your core WordPress installation, extending its capabilities and adding new features.
Think of WordPress Core as a new smartphone, and plugins as the apps you download. You install them to customise the function to your specific needs.
With over 60,000 free plugins available in the official WordPress repository, plus thousands of premium options, there is a plugin for almost every imaginable task.
Essential plugins
While you should always be judicious about which plugins you install, the following five categories are absolutely essential for any professional small business site.
| Category | Functionality | Reason |
|---|---|---|
| Security | Firewall, Malware Scanning, Brute-Force Protection (e.g., Solid Security, Wordfence or Sucuri) | Protects your site from hacking attempts, malicious code, and unauthorised access. |
| Backup | Scheduled Automatic Backups, Cloud Storage (e.g., UpdraftPlus or Solid Backups) | Creates a complete copy of your site. If your site ever breaks, you can restore it with a single click. This is your insurance policy. |
| SEO | On-Page Optimisation, XML Sitemaps (e.g., Yoast SEO, Rank Math or All In One SEO) | Provides a checklist and tools on every Post and Page to help you optimise content for search engines. |
| Forms | Drag-and-Drop Contact Forms, Email Integration (e.g., WPForms or Gravity Forms) | Allows customers/clients to contact you without exposing your email address, which is crucial for lead generation. |
| Caching & Speed | File Optimisation, Caching (e.g., WP Rocket or LiteSpeed Cache) | Speeds up your website by saving static versions of your pages, reducing server load, and significantly improving load times. |
Recommended reading: 50+ WordPress plugins across 10 essential categories
Plugin installation
Installing a plugin is simple and is almost always done through the WordPress Dashboard:
- Navigate to the Plugin Directory: Go to Plugins > Add New in your Admin Menu.
- Search: Use the search bar to find the plugin you need.
- Install: Click the Install Now button on the correct result.
- Activate: Once installed, the button changes to Activate. You must click this to turn the plugin on and allow it to function on your site.
- Configure: The plugin will usually create a new dedicated menu item in your Admin Menu or add its settings under Settings or Tools.
If you purchase a premium plugin, the developer will send you a
.zipfile. Use the Upload Plugin button on the Plugins > Add New page to install it directly from the file.
Avoiding “Plugin Bloat”
While plugins are wonderful, adding too many or using poorly coded ones can kill your site’s speed and stability.
How bloat affects your site:
- Speed: Each plugin adds extra code (scripts and styles) that must load every time a visitor views a page. Too much code slows your site down, hurting both user experience and SEO.
- Security: Every plugin is a potential entry point for hackers. The more plugins you have, the larger your attack surface.
- Conflicts: Plugins can often be incompatible, causing features to break or your entire site to display the dreaded “White Screen of Death.”
Choosing your plugins:
- Be Intentional: Every single plugin should solve an essential business problem. If you haven’t used it in six months, delete it.
- Check Reliability: Before installing, always check the plugin page for:
- Active Installations: High numbers (100,000+) are a good trust signal.
- Last Updated: It should have been updated within the last few months to ensure compatibility and security.
- Ratings: Look for 4.5 stars or higher.
- Deactivate AND Delete: When you stop using a plugin, navigate to the main Plugins menu, deactivate it and then delete it completely to remove leftover code and database entries.
Key Website Fundamentals
Essential settings
Navigate to Settings in your WordPress Dashboard to configure these critical items:
1. Permalinks (SEO-Friendly URLs)
Permalinks are the permanent links (URLs) to your individual posts, pages and categories. The default WordPress setting (yourdomain.com/?p=123) is poor for SEO and user experience. Instead, we’ll use Post Name (yourdomain.com/beginner-wordpress-guide/)
- Go to: Settings > Permalinks.
- Select: Choose the Post name option.
Set your Permalink structure before you publish any content. Changing it later will result in broken links (404 errors) and requires complex redirects.
2. Homepage Display
You need to tell WordPress what to show when someone visits your main domain.
- Go to: Settings > Reading.
- Choose:
- Your latest posts: Ideal if your website is a traditional blog.
- A static page: Ideal for a business or portfolio site. If you choose this, select a Page you’ve created to be your Homepage (Home/Welcome) and a separate Page for your Posts page (Blog).
Recommended reading: 35 things to do after installing WordPress
Basic On-Site SEO
SEO starts here, at the site level. You must ensure Google can read and understand your site’s structure.
1. The Search Engine Visibility Check
Ensure you don’t accidentally tell Google to ignore your site. Go to Settings > Reading. Make sure the box next to “Discourage search engines from indexing this site” is UNCHECKED.
2. Google Search Console (GSC)
GSC is a free, essential tool provided by Google that shows you how your site is performing in search results.
You need to verify ownership of your site with Google by placing a small verification code (an HTML tag) on your site. The easiest way is to use an SEO Plugin. Once you install a recommended SEO plugin, it will provide a dedicated field where you simply paste the GSC verification code.
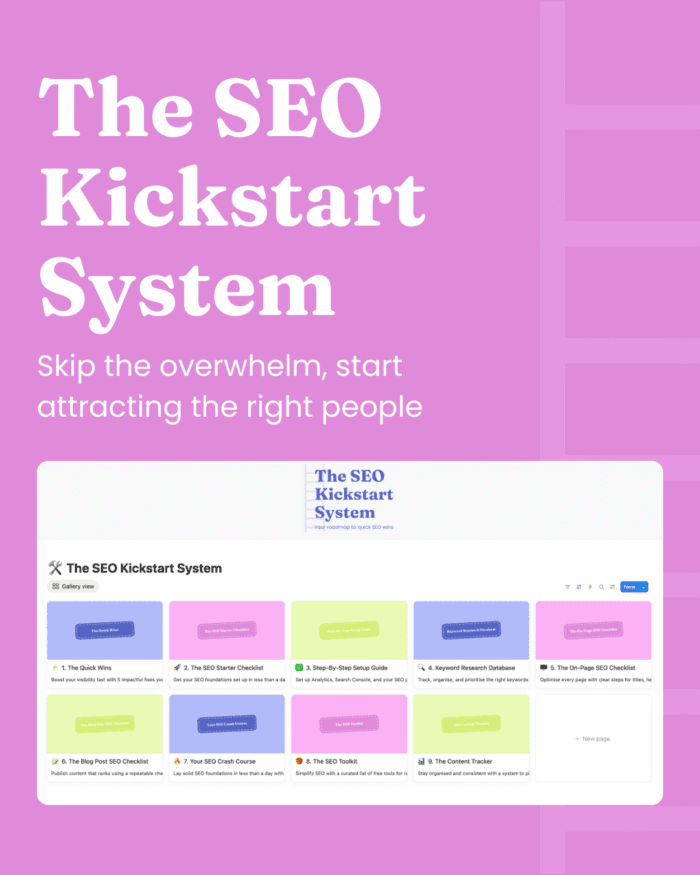
Get Found Online Faster with SEO That Works
The SEO Kickstart System helps you optimise your website in just one weekend. With checklists, templates and guides, you’ll set up SEO the right way without the overwhelm.
Perfect for new business owners, creators and entrepreneurs who want to attract the right audience.
User Management
If you ever hire a writer, an editor or a virtual assistant, it’s better to set up an account for them rather than sharing your Administrator login. WordPress uses User Roles to limit access based on responsibility, which is a core security measure.
| User Role | Best For | Capabilities |
|---|---|---|
| Administrator | The Site Owner (You) | Full control: can install themes/plugins, delete the entire site, and manage all users. Limit this to one or two trusted people. |
| Editor | Content Manager | Can edit, publish, and delete any post or page, including those by other users. Cannot change site settings or install plugins. |
| Author | Trusted Writer | Can only write, edit, and publish their own posts. Cannot modify site settings or edit other users’ content. |
| Contributor | Guest Writer | Can write and edit their own posts but cannot publish them (requires Editor/Admin approval). Cannot upload images. |
WordPress Security
Since WordPress is so popular, it’s a common target for automated attacks. However, a few simple practices will protect you from the vast majority of threats.
- Choose a Strong Password: Use a mix of uppercase and lowercase letters, numbers, and symbols. Your password for the Administrator account should be long and unique (ideally 12−16 characters). Use a password manager to help.
- Change the Default Username: When you set up your site, use a unique username that is not the default “admin” or a similar generic term. Automated hackers constantly try to guess “admin” as the username.
- Enable Two-Factor Authentication (2FA): Install a security plugin (like Solid Security, Wordfence or a dedicated 2FA plugin) to require a second code when logging in. This is the single best way to prevent brute-force attacks.
- Hide Your Login URL: By default, your login is at
yourdomain.com/wp-adminoryourdomain.com/wp-login.php. Use your security plugin (like Solid Security) or dedicated plugin (like WPS Hide Login) to change this URL to something unique to help prevent brute-force bot attacks.
Maintenance
Regular Updates & Backups
This two-part checklist is the most important routine you will perform:
1. Updates
Updates for WordPress, Themes, and Plugins often include crucial security patches and bug fixes. An outdated site is a vulnerable site.
You’ll want to complete updates regularly, especially if they are security releases. Always create a full backup immediately before performing any major update (especially a WordPress Core update).
You’ll find all WordPress Core, Plugin and Themes updates under Dashboard > Update.
2. Backups
A backup is a complete, restorable copy of your website. If a plugin update breaks your site or a hacker gets through, a recent backup means you can be back online in minutes.
Use a plugin like UpdraftPlus (free) to schedule automated backups. Configure it to store the backup files off-site (in the cloud, like Google Drive or Dropbox), not just on your hosting server.
For active sites or e-commerce stores, back up daily. For less active sites, weekly or monthly is fine.
Common Issues
If you log in one day and see a blank white page, don’t panic! This is the infamous “White Screen of Death” (WSOD), and it’s almost always caused by a plugin conflict or theme issue.
| Problem | Likely Cause | First Steps to Fix |
|---|---|---|
| White Screen of Death (WSOD) | Plugin conflict or PHP memory exhausted. | 1. Deactivate ALL plugins (you may need to do this via your host’s file manager if you can’t access the dashboard). 2. If the site returns, reactivate plugins one-by-one to find the culprit. |
| Site is Slow | Large, unoptimized images or lack of caching. | 1. Install and configure a Caching Plugin (e.g., WP Rocket). 2. Use an Image Optimisation Plugin (e.g., Smush) to compress existing photos. |
| Error Establishing Database Connection | Corrupted database or incorrect login details in a core file. | Contact your Web Host’s Support. This is a critical issue they can usually fix quickly from their end. |
Recommended reading: Fix the critical error on your WordPress website
Analytics
To grow your site, you need to measure its performance.
Google Analytics (GA4) is the industry-standard tool for tracking visitor behaviour (who visits, where they came from, what pages they view).
Install a plugin like MonsterInsights or Google Site Kit. These make the setup easy by connecting directly to your Google account and placing the necessary tracking code on your site without manual coding.
Google Search Console (GSC) is also essential for monitoring your site’s technical health and checking which of your content ranks in Google search results.
Conclusion
Key takeaways
The WordPress journey is one of continuous learning and growth. As a beginner, focusing on these few, simple concepts will ensure your site remains secure and scalable:
- Use WordPress.org (self-hosted) for total control and limitless scaling.
- Set your Permalinks to Post name immediately.
- Use a strong, unique Administrator password and a backup plugin.
- Only install essential plugins and delete those you don’t use to prevent plugin bloat.
- Make weekly updates to the Core, Themes and Plugins part of your business admin.
The WordPress Codex is an official online manual from the developers, it is full of resource and details about using WordPress.