Now that you’ve learned all about domains and hosting and have hopefully managed to purchase exactly what you need, it’s time to link the two together so we can set up your new website or blog.
When and why do I need to link my domain and hosting?
As mentioned in those previous posts, you don’t need to purchase your domain and hosting from the same place. If you have purchased them together from the same provider then you don’t need to do this. If you haven’t purchased them together from the same provider you’ll need to point your domain to your web hosting by updating your DNS.
Domain Name Servers (DNS) are what translate each domain name to the numeric Internet Protocol (IP) addresses. This is necessary because domain names are there for people to use (as they are easily remembered) but computers access sites based on IP addresses. We need to link the two so that your site is accessible using that domain name.
How to update your DNS and point your domain to your hosting
These steps will differ slightly depending on where you’ve purchased your hosting and your domain, but here is an overview of what you’re looking to do.
1. Get nameservers from web host
The first step is finding your host’s Name Servers, so login to your hosting account CPanel or admin panel.
With some hosting companies, you’ll first have to assign the hosting to a domain name. Click into your hosting settings and click assign, next you’ll need to enter your domain.
Now you’ll need to get the Name Servers. This may be displayed once you’ve assigned your domain, otherwise you’ll usually find it under DNS settings. They may have also been sent to you in an email when you purchased your hosting. They will often look like ns1.hostdomain.com, ns2.hostdomain.com and so on.
2. Change nameservers on your domain registrar
The next step is to enter those Name Servers into your domain registrar’s settings so open a new tab and login to your domain account.
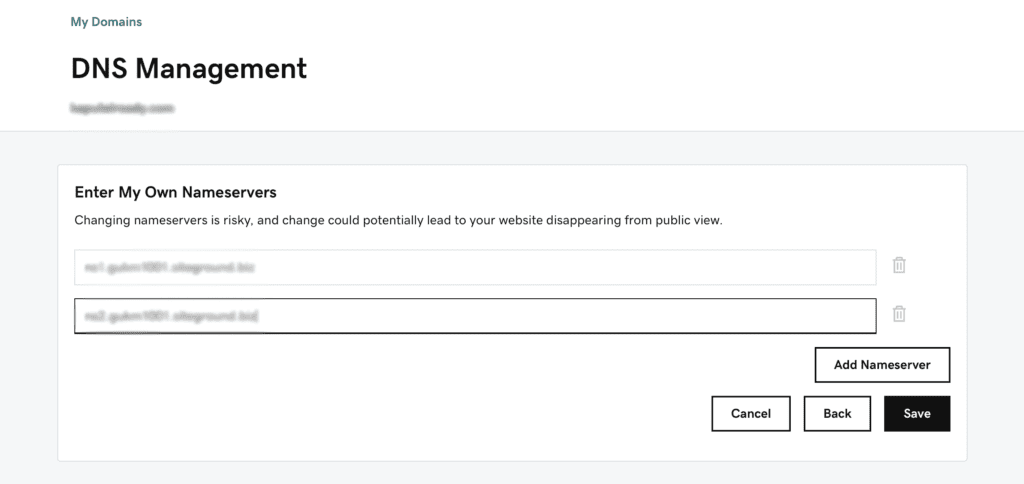
You’ll typically find the Name Servers fields in your domain settings or manager. Some registrars will have a button or tab for “Manage DNS”, “Domain Name System (DNS)” or “Name Servers”. From there select the domain you want to use.
Add the Name Servers provided by your hosting here by setting them yourself or replacing what is already there.

3. Wait for updates to take place
That’s it! You’ve set your Name Servers and linked your domain to your hosting. You may have to wait anywhere from 30 minutes up to 72 hours for it to update and fully take effect across the internet. Once it does you should be able to reach your site with your domain.
The next step is installing WordPress or your chosen CMS and building your site – stay tuned!